Showing posts with label Recipes. Show all posts

Tuesday, April 3, 2012

Chocolate Mousse Cheesecake Tart

Made this on the weekend, and thought I'd share my recipe with you all. I'm not going to rave on about how good it was. I just hope you give it a try and see for yourself. All I will say is that it was a hit with everyone and whatever was left was very quickly polished off the next day by whoever got there first.... and we all tried to be first *guilty*.


A bit of a description: The base is made with oreos and a few plain sweet biscuits - makes for a yummy chocolaty flavour without being too rich. The bottom layer is chocolate flecked cheesecake - a recipe that I basically made up by tweaking lots of other different cheesecake recipes I had looked at a few years ago. The top layer is a simple chocolate mousse using half dark chocolate and half milk chocolate so that it's not too rich. Altogether it makes for a super yummy delightful dessert that really is very more-ish. You don't feel sick after this unless you have pigged out on something else beforehand.

It's not a 5 minute wonder, but it is easy to make. And once it's done, there is no baking. This is a great dessert to make the day before or even a few days before. I plan on making a double amount and using a bigger tin for this Easter weekend.


Chocolate Mousse Cheesecake Tart

Base
150g Oreo biscuits
About 5 plain sweet biscuits, such as Arnotts Marie
125g butter, melted

Lightly grease a 23cm springform/cheesecake tin.
Process all biscuits into fine crumbs. Combine with melted butter and mix well. Press evenly into tin and smooth out with the back of a spoon. Chill while preparing the filling.

Bottom layer: Chocolate flecked cheesecake
250g packaged cream cheese, softened
1/6 cup caster sugar (I just used half of a 1/3 measuring cup)
1/2 tsp vanilla extract
150ml thickened cream
1 1/2 tsp gelatine
1 tbsp boiling water
2 tbsp grated dark chocolate

Sprinkle the gelatine over boiling water and mix briskly with a fork until dissolved.

In a medium bowl, beat together the cream cheese, sugar and vanilla essence until smooth and creamy.

Beat in the gelatine dissolved in water.

In a separate bowl, whip the cream until medium peaks form. Fold gently into the cream cheese mixture.

Fold in the grated chocolate.

Pour the mixture onto the biscuit base, spreading it gently to the edges with the back of a spoon. Try to get the layer as even and smooth as possible. Chill while preparing the chocolate mousse layer.


Top layer: Chocolate mousse
50g dark chocolate, chopped
50g milk chocolate, chopped
1/3 cup thickened cream
1 egg, at room temperature, separated
1 tbsp caster sugar

Place both chocolates in a heatproof bowl, and microwave at 20 second bursts, stirring with a metal spoon after each interval, until melted and smooth. You may need to decrease the time towards the end so as not to overheat your chocolate (ie. 10 or 7 second bursts). Set aside to cool.

Meanwhile, whip the cream until medium peaks form.

Add the egg yolk and half the cream to the chocolate, and stir to combine.

Add the other half of the cream, and fold gently through.

Using clean dry beaters and bowl, beat the egg white until soft peaks form. Add sugar and continue beating until glossy and sugar is dissolved.

Fold the egg white mixture into the chocolate mixture in two batches, until combined. Don't over mix, but there shouldn't be any white streaks left in the mixture.

Gently pour over the cheesecake filling and spread as evenly as possible up to the edges with the back of a spoon. You can shake the tin very gently to smooth out the surface.

Refrigerate for 4 hours, or until set. I prefer to make mine the day before and just refrigerate overnight.

To serve, you could pipe whipped cream around the edges and decorate with chocolate lattices, or sprinkle chocolate curls, or just serve it as is. Will yield 12 conservative serves, or 8 really generous serves.


*A couple of tips: Try to use good quality chocolate, as this will effect the taste and texture of your final product.

To avoid seizing your chocolate when you add the egg yolk and cream, try to have all of your ingredients at as similar temperature as possible when combining into your chocolate. Allow your chocolate to cool right down to room temperature, but not so cool that it begins to set.


xx

Monday, May 16, 2011

Teapot Cake At A Kitchen Tea


Well I was going to limit this post to just the cake, but I decided to include some other things too, because the whole event was actually quite lovely. It was the kitchen tea for my SIL hosted by the other two bridesmaids and myself. We themed it on a High Tea style... which, actually, I found later was not what I thought it was. What I was thinking of was Afternoon Tea, otherwise known as Low Tea. High Tea was what the lower class folk had, and equates more or less to what dinner would be today. It was called High Tea because it was taken at a high table. Low Tea or Afternoon Tea was called such because it was tea and refreshments taken at a low table, sometime in the mid afternoon. So, yeah... fail on that count LOL. But everyone else knew what I meant! So in the end it didn't matter.

And it was so nice! Have you ever had tea out of proper tea cups? And saucers? If you haven't, you should seriously try it. I know we are all used to mugs these days and tea cups are a bit smaller than mugs..... Ok, they are alot smaller. ...Tiny... really. - But that's not the point! There is just something about sipping tea from a dainty tea cup balanced just so on its lovely matching saucer. You drink, and then refill, and drink some more. And for that reason, your tea is always hot! Can't have a tea party without tea, but besides the tea, we also had wine, punch and a gorgeous range of dainty eats: Ribbon sandwiches, mini quiches, pickle, cheese and cabana sticks made up the savouries. And for sweets, mini lemon meringues, mini vanilla cupcakes, butterfly cakes and of course, scones with jam and cream. And the big cake. The Teapot cake! Everything was delicious, and I still can't thank the other bridesmaids enough for all the amazing work they put in with cooking, cleaning and setting things up. You rock girls!


The inside is chocolate cake with caramel buttercream. The buttercream tasted lovely when I checked it, but I was so disappointed to find that you couldn't taste the caramel in it once you ate it with the cake. Oh well. I know for next time now.


The cake is covered in ivory fondant, with rose detailing embossed on the sides and lid, and hand painted in with edible colours. The gold gilding around the edges was also edible. The sugar bowl and creamer are cupcakes decorated with the same. The sugar bowl had real sugar sprinkled on top, while the creamer was topped with white chocolate ganache. Tasted awesome, but I thought it looked like the milk in the creamer had turned because it was more yellow than white!! LOL. Fortunately, this didn't put anyone off :) The only thing was, they all thought the cake was too pretty to cut and eat!


I had iced the board and embossed it too, to try and make it look like a small table cloth. The one thing I forgot to do was put a ribbon around the edge of the board... was kicking myself for losing that detail. It really does make a difference!

I had made the mini cupcakes as well. Vanilla with vanilla buttercream and handmade sugar flowers. I just thought they turned out gorgeous with their pretty pastel colours. I really loved these ones, but again, people thought they were too pretty to eat!


There were a couple of games, and my SIL was showered with gifts for the kitchen. Bottom line: she felt very spoiled, which was the whole point really :).

One of the games was the toilet paper bridal gown. If you don't know this one, the name kind of speaks for itself. You break up into small groups, choose a bride, and make her a gown out of toilet paper. My daughters were in a group together with another one of our guests, and I couldn't stop smiling at the scene they made! Big Miss was standing, so proud and dignified modeling her designer gown, and Miss Jane was so busy working away to dress her big sister up with the help of the other lady in their group. It was just beautiful! A little glimpse of the future methinks. I almost had tears in my eyes.


Such a perfect reflection of their personalities. Amazing.


Miss Jane explains to us the details of their couture creation.


Big Miss was so pleased with her designer gown!


Of course, Miss Jane was not going to be left on the shelf, so she got the lovely Katherine to make her a bridal gown too. Cute :)


Miss Jane gets her own designer gown.

Personalised sugar cookies went out as party favours. I've only made these a couple of times before, but this was the first time I had iced them properly. All the flowers were handmade, and I tried to stick to the subdued and powdery colour palette to match the party theme. I loved the way these turned out - so pretty! Most people thought these were too pretty to eat too, but I couldn't wait to have one... and they didn't disappoint - delicious! But then, they couldn't really fail when they are Peggy Porschen's recipe /wink. I wanted to provide the recipe for you here, but it's copyrighted and I don't have written permission from Peggy, so I don't feel comfortable doing it :P. Other people have though, and one place you can find the recipe is on Carly's Kitchen blog - it's the same one I used. Not a difficult recipe by any means, so don't be afraid to try it! They are seriously yummy, with or without icing. Buttery and tender but not cakey, and firm enough to hold their shape and icing.


Sugar cookies; recipe from Pretty Party Cakes


We all had a lovely time. It was the first time I have made a teapot cake, and it didn't quite turn out the way I envisioned it. But in the end, despite all the flaws I could see, I was really pleased with the result, and learned some new techniques along the way.


xx

Monday, November 29, 2010

Country Women's Association of NSW Chocolate Cake


I got this recipe off the side of a packet of self-raising flour. Hehehe.... well it's true! Had to try it, only because it was from the Country Women's Association of NSW - and let me tell you, the country women of Australia can cook! - and because it had honey in the icing :P. And this intrigued me! Honey and chocolate icing.... yummmm!!

This cake is extremely easy to put together. I don't know if it's just me, or if it really is a characteristic of the Aussie country womens' baking, but I find that many recipes I get from country girls are easy-as-just-throw-it-all-together types. I like this. It makes baking seem more achievable when you're pressed for time or energy.

As for the cake itself... well... hmm... I honestly can't say it's anything more than a generic chocolate cake really. Not particularly rich. Not particularly moist or dry. I think it would be lovely layered with some strawberries and cream, but the icing in this recipe is also a delicious match. I really think it's the icing that gives this cake the 'yum' factor. It tastes a lot like a one of those Nougat Honey Logs. Anyway, without further ado, here is the recipe!


Chocolate Cake


2 cups self raising flour
1 1/2 cups caster sugar
125g softened butter or margarine (I always use butter!)
4 eggs
1/2 teaspoon bicarbonate of soda
1 teaspoon vanilla essence
1/2 cup cocoa powder
1 cup milk

Preheat oven to 180C conventional/160C fan forced. Grease and line a 20cm round deep cake tin.

Place all ingredients into the large bowl of a mixer and beat for 3 minutes on medium speed.


Pour into tin and bake for 1 hour 15 mins - 1 hour 30 mins, or until cooked*. Cool for 5 minutes in the tin, then turn onto a wire rack. Cool completely before icing.

*Mine only took 1 hour, so be sure to check how it's doing after about 50 minutes!


Chocolate Honey Icing

Little note here: The recipe says to 'cream' the butter and icing sugar... personally, I don't see how you can cream 1 tablespoon of butter into 2 cups of icing sugar LOL, but I tried anyway. The butter kind of disappears into the sugar and the whole thing looks dry and a bit lumpy in parts. Just mix as well as you can and continue... it will all come together in the end!


2 cups icing sugar mixture
2 teaspoons honey
1 tablespoon cocoa powder
1 tablespoon butter, softened

Cream butter and icing sugar mixture in medium bowl.
Add cocoa and honey, stirring well to combine.
Add sufficient hot water to make a smooth icing - (about 3 tablespoons)


I'm enjoying a piece right now with a hot cup of tea.....


xx

Wednesday, November 3, 2010

Vanilla Cake: Egg & Dairy Free

We are very blessed to have no food allergies in my family. But I know plenty of others who do, and anytime we host new people at our home for a meal or party, I ask if there are any food allergies or intolerances. My aim is that everyone feels comfortable and welcome. There have been a few incidences in recent months that have all culminated into the inspiration to go ahead and explore some allergy-friendly recipes. Here is my first tested recipe.


The original post can be found here. I haven't really adapted it so much as change the name of some ingredients to what we know them as in Australia. It's super easy to make, which is always a bonus when you're time-poor.

A couple of tips!

1) Be sure to prepare your pan and oven first, because it is important to get the batter into the oven as soon as the last ingredient is added.

2) The last ingredient is the vinegar. You really need to work quickly when stirring it in, pouring into the pan and putting it into the oven. This is because the vinegar activates the bicarbonate of soda in the cake batter, producing the bubbles and aerating the cake. In other words, this is your raising agent. If it is left to sit too long before it goes into the oven, the bubbles will dissipate, and you will get a flat, rubbery cake.

1 1/2 cups plain flour
1 cup sugar
1 tsp bicarb of soda
1/2 teaspoon salt
1/2 cup vegetable oil (I used canola oil)
1 cup soymilk (I used vanilla flavoured)
1 tbsp vanilla extract
1 tbsp vinegar

Preheat the oven to 180C

Lightly grease and line an 8inch round or square cake pan.

Into a large bowl sift dry ingredients. Stir around with a wire whisk to distribute ingredients evenly.

Add all wet ingredients except vinegar. Whisk until no lumps appear and the batter is smooth.

Add vinegar, stir through quickly about 7 times and pour into the pan immediately.

Bake around 30 minutes, or until it begins to pull away from the sides of the pan, or a skewer inserted into the middle comes out clean.


The cake turned out beautifully moist. It's not particularly fluffy, but not particularly dense either. Lovely vanilla flavour. In keeping with the egg-free dairy-free theme, I whipped up a quick frosting with......

2 tbsp Nuttelex (non-dairy spread)
1 cup pure icing sugar
2 tsp water
1 tsp vanilla extract

Just beat it all up together till it's smooth and fluffy.

By the way, my daughers loved it... even the one who doesn't like creamy frostings!


xx

Tuesday, September 21, 2010

Simple Chocolate Biscuits

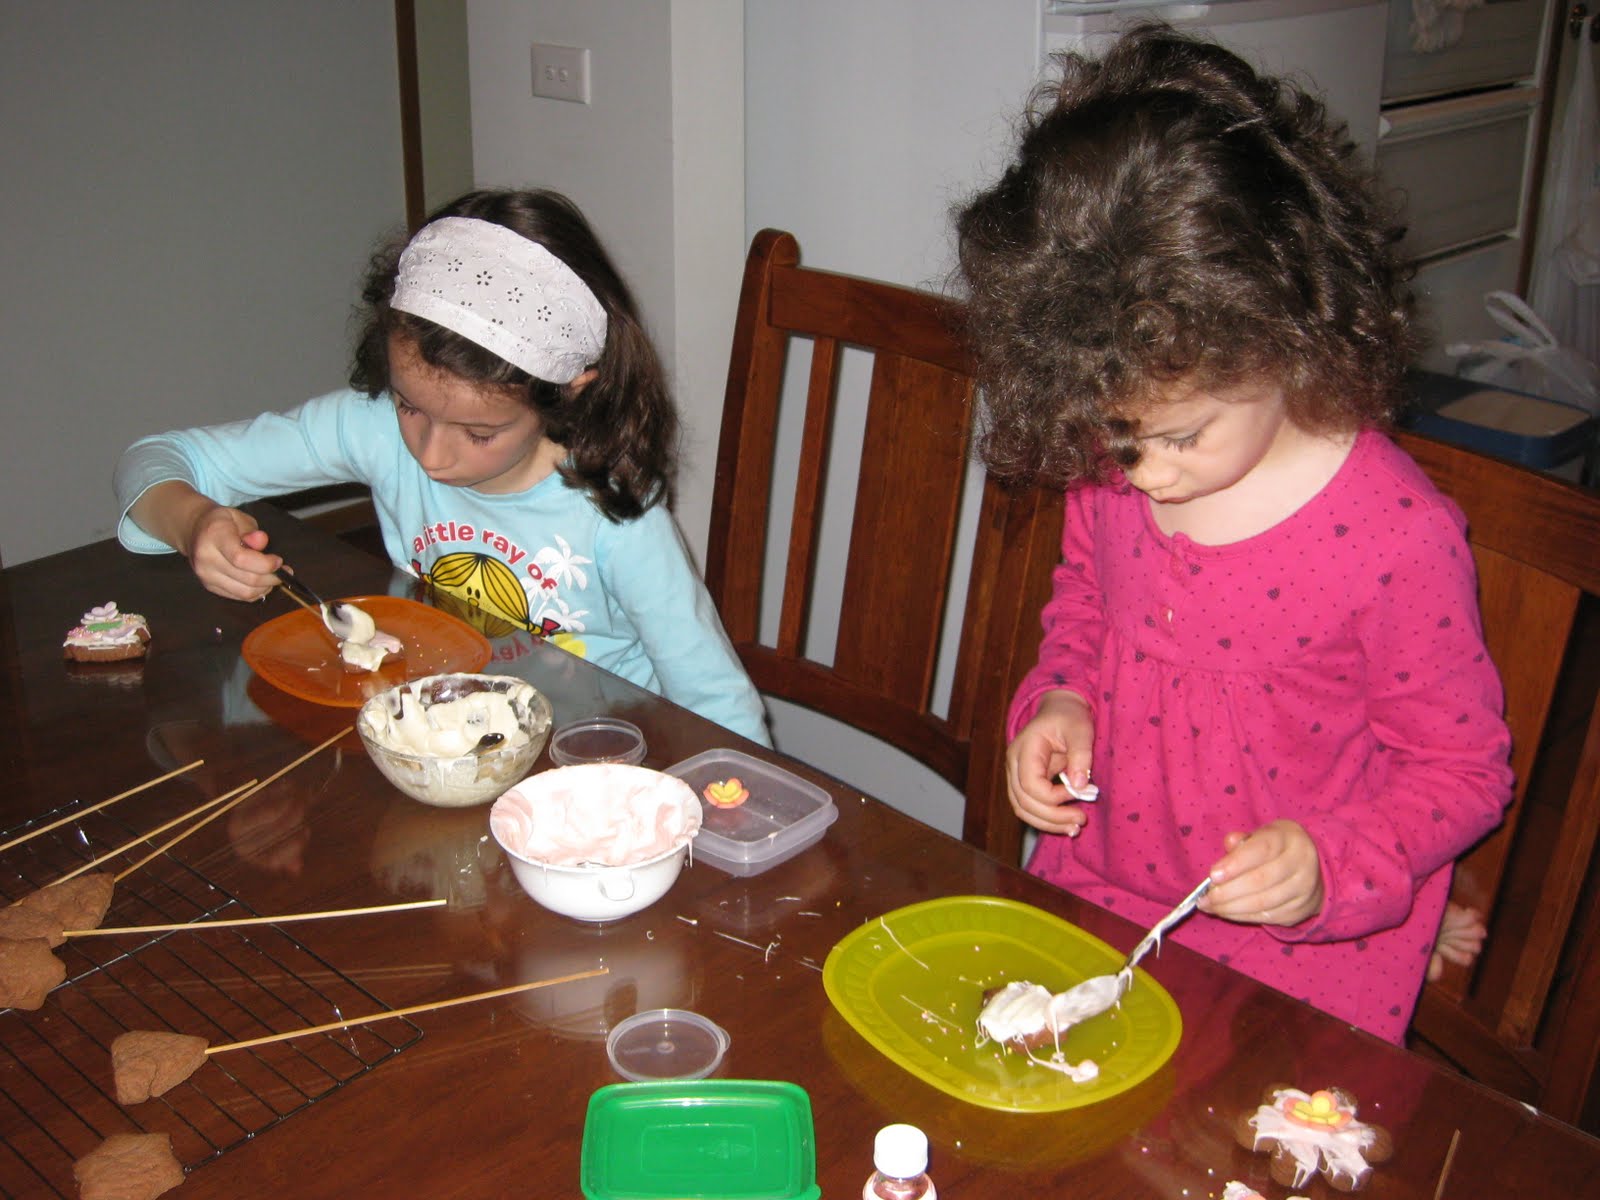
To start off the school holidays, me and my girls did some baking :). We made simple chocolate bickies and even turned some into cookie pops! It's a great easy recipe, similar to a chocolate sugar cookie. This recipe comes from a book that used to be my grandmother's. It is actually part of a recipe for Choc-Mint Swirls, but I adapted the biscuit part, and just used that. The girls chose some fun shapes to cut the cookies, and we used melted chocolate for icing. Too easy!


Yep, cooking with kids is messy! Which is why I rarely do this LOL


65g unsalted butter, softened
1/4 cup caster sugar
1/2 cup plain flour
1/3 cup self-raising flour
2 tablespoons cocoa
2 tablespoons milk

Preheat oven to 180C and line two biscuit trays with baking paper.

In a small mixing bowl, beat the butter and sugar with electric beaters until light and creamy.

Add sifted flours, cocoa and milk.

Stir with a flat-bladed knife until the mixture forms a soft dough.

Turn out onto a piece of baking paper and knead for 1 minute or until smooth.

Roll dough out to around 5mm and cut your biscuits.

At this point, I pressed skewers into some of the biscuits to make cookie pops

Place on the trays and bake for around 12 - 15 minutes, depending on the size of the biscuits. Transfer to a wire rack to cool completely before decorating.


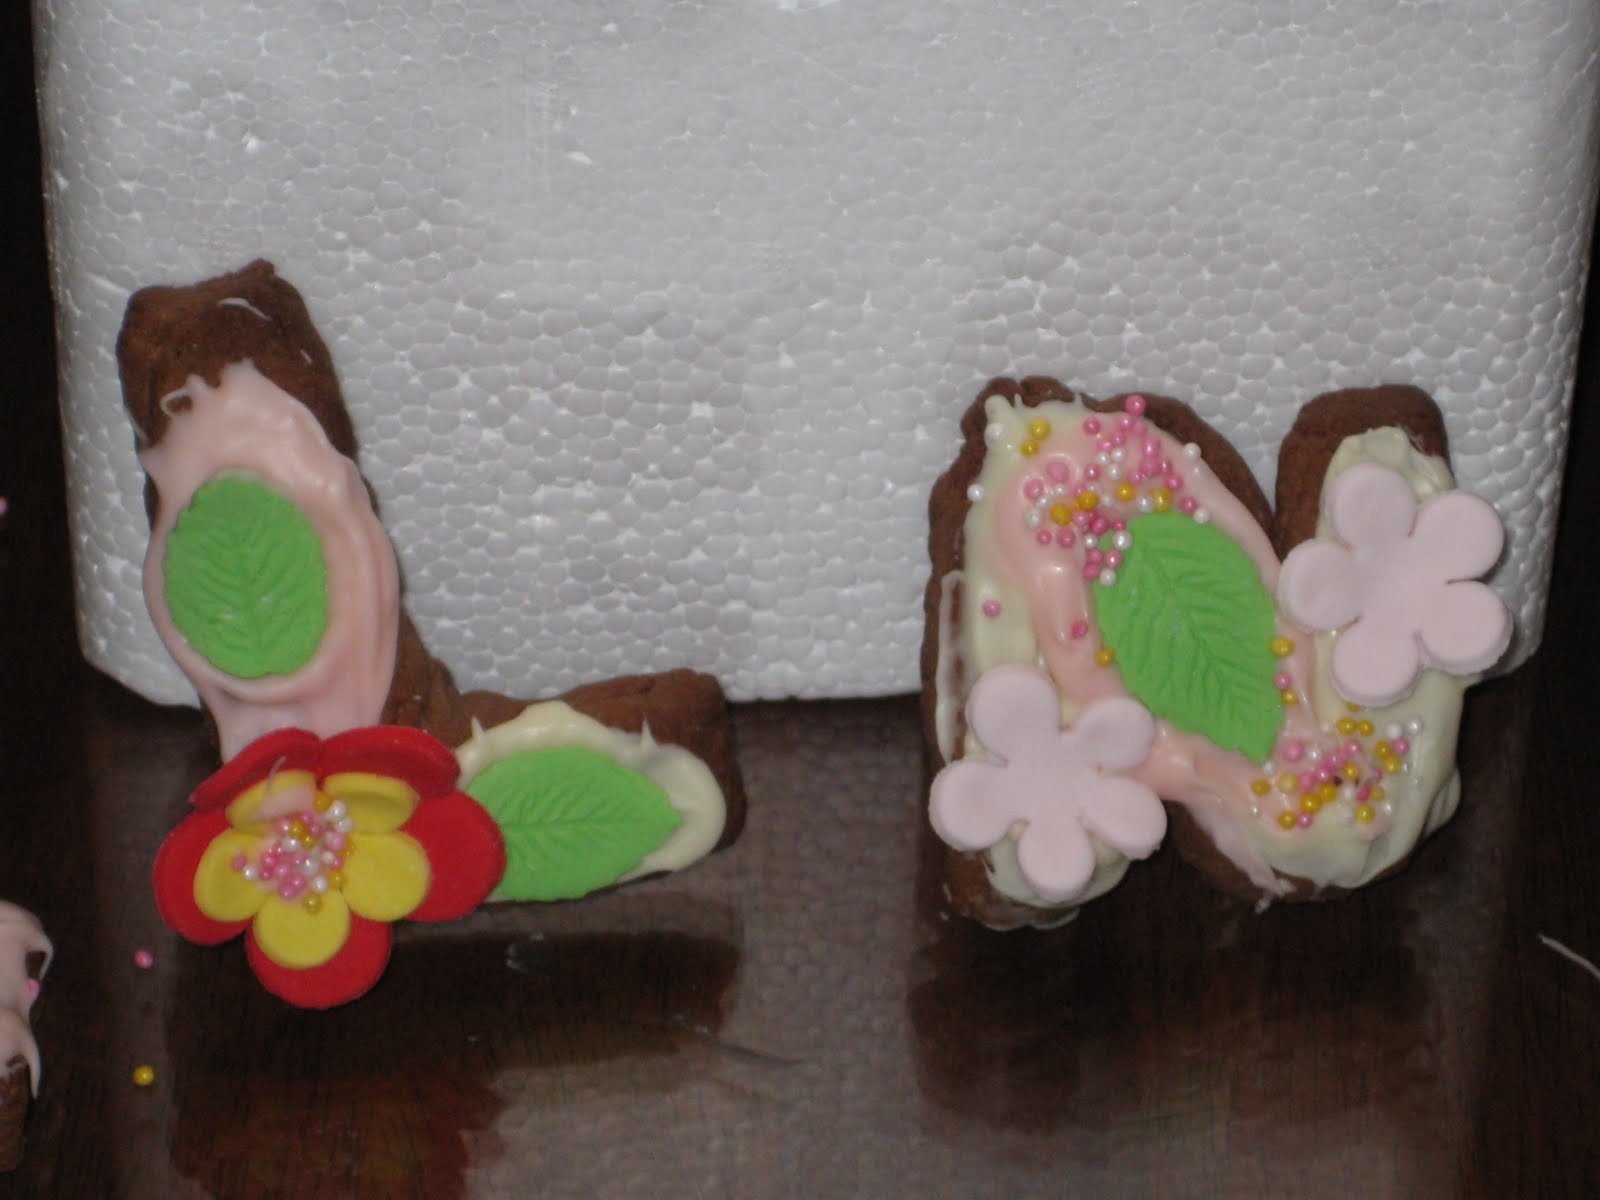
Pretty flowers.


And hearts.... girly girly.


Miss Jane requested white chocolate for the icing - no probs! Just zap a handful of chocolate melts in the microwave at 15 second increments and stir till melted and smooth. As a special treat I made another small bowl but tinted it pink and flavoured it with strawberry oil. They loved it!


Don't be fooled by the serious concentrating face..... they were both having a great time!


I also happened to have some spare fondant flowers and leaves which came in handy.


So proud of their work :) And yes... they have all been eaten!


xx

Sunday, June 20, 2010

Red Velvet

This post is dedicated to Jill, my cousin-in-law, who lives all the way across the other side of Australia and is craving Red Velvet Cupcakes. Wish I could courier these over to you Jill, but I can't, so you'll have to settle for a feast of the eyes only :( .


I have had red velvet on my do list for ages now. Finally got around to it! I think I am a bit behind on the red velvet cupcake craze, but I guess it has been a little slow to hit Australia. Or maybe I'm just slow. I don't know. Haha! I must admit, when making it, I was a bit reluctant to taste the batter because it was, well, so red - it looked like paint! Usually I fight my girls over who is going to lick the beaters and bowl *sheepish grin* - cake batter iz teh bomb, ok? - but not this time. In the end though, I plucked up my courage and had a taste.

It was lovely!... It had a really lovely flavour to it. Sort of aromatic and vanilla-ish.

This cake recipe is adapted from Bakerella (the frosting recipe is mine) - I love her website, it is one of my all time favourite go-to sites for inspiration in baking. If you enjoy baking too you should check it out. Or even if you just enjoy the eating part. Seriously. She's awesome. She invented cake pops! I've made the cake balls before, but not the pops. Another thing on my do list....

Enough rambling. Here is the recipe - it's easy as!

Red Velvet Cupcakes

1 1/4 cups plain flour
1 cup white sugar
2 tsp cocoa
1/2 tsp salt
1/2 tsp bicarbonate of soda
1 egg
3/4 cups canola oil
1/2 cup buttermilk
2 tsp white vinegar
1/2 tsp vanilla extract
2 tbsp red food colouring

1. Preheat oven to 180C. Line your cupcake pan, or grease and flour it if you prefer.
2. Sift dry ingredients into a mixing bowl.
3. Add wet ingredients in.
4. Mix on medium-high speed for about 1 minute, or until completely combined.
5. Pour into cupcake tin.
6. Bake for about 20 minutes, or until a skewer inserted into the cakes comes out clean. I usually test one in the middle and one on the edge. Allow to cool for 5 minutes or so in the tin, then place them on a wire rack to cool completely.

How easy is that! And just in case you don't believe me, I'll show you again.


Sift dry stuff in.

Add wet stuff in.

Mix mix mix.

Told ya it looks like red paint!


Pour pour pour. I always make a mess hehe :)


And bake bake bake!


Look at those gorgeous redheads.


Cream Cheese Frosting
175g Philly cream cheese, softened
30 butter, softened
1 2/3 cups pure icing sugar
1/2 tsp vanilla extract
1 tsp water

1. Place cream cheese and butter into a mixing bowl, and mix on medium-high until creamy
2. Gradually add in half the icing sugar, mixing well to combine.
3. Add the vanilla and water, and mix to combine.
4. Then add remaining icing sugar and mix until creamy.

So creamy and yummy I think I'm gonna die.


Frost away!


Are you drooling yet?


I loved the flavour and texture of this cake... I can see why people get hooked on it. Light and sweet with a touch of tartness in it. I think it's the buttermilk that gives it that tart flavour. And the texture! So soft and ... well... velvety! Coupled with the cream cheese frosting and it just makes for an 'mmmmmmmm!' combination. My hubby just raved about it too, which is something I didn't expect. The man never ceases to surprise me. When I mentioned that I might use a bit less red dye next time, he vehemently protested ~ "No!" he said; "The colour is part of the charm, it's very striking". On that, I must agree :) I'm not sure that it beats chocolate cake for first place in my favourites, but it comes pretty close I think!

Now you've seen how easy it is, go ahead and make some! My biggest girl has asked me to make them blue next time...... hmm...


xx